SmartWOP comes with a selection of preinstalled connector types that are most commonly used. But you can always create more. This guide will give you an example of how to create a new connector.
In this guide we will take a look at the Screws and create a new type
Go to the Machining tab (Hotkey: B) and find the Screws icon and click it.
The Screws template will open. (Templates have a red area on the left while preferences of already placed connectors have none)
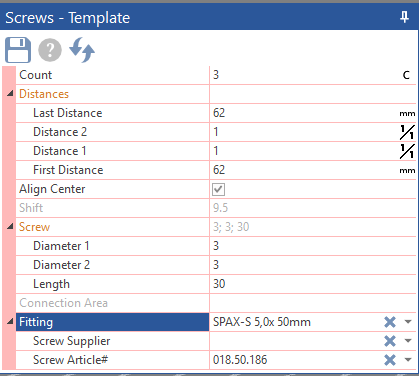
In the Fitting section, you can enter the name of your new screw as well as Supplier and Article numbers, and while the name is mandatory to differentiate the screws, supplier and article number are optional.

Now it is time to define the Screw by defining the drilling diameters.
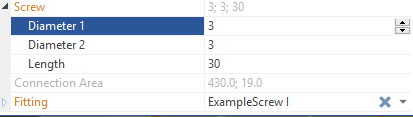
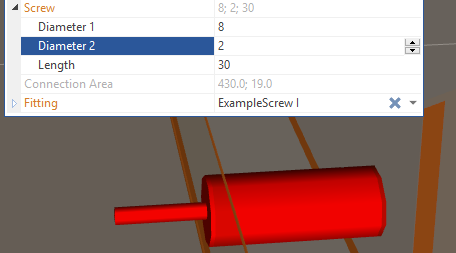
Diameter 1 is the boring diameter for the first panel the screw will pass through and Diameter 2 for the second panel, see the extreme example underneath for reference. Lenght is the lenght of the bore.
Once you are happy with your new screw dimenstions and name you can start using it right away, or hit the Floppy Disk icon to save the template (meaning all of the settings including screw count and distances will be applied the next time you use this connector) The screw itself has already been saved and can be selected from the Fitting list.

It is possible, that you are not the only person working with SmartWOP in your company, and that the other guy keeps on messing up your connectors – so you have to readjust them every time.
Prevent him from doing that by creating connectors in Administrator Mode.
Go to File>Options>General and check the box for Administrator Mode and confirm by clicking on Apply. Now return to the Machining tab. Create another new Screw. Upon hitting Enter in the Fitting name section, you will notice an open lock icon.

This indicates that you have the right to change the screw’s parameters. Once you are done, either restart SmartWOP or exit the Administrator Mode by unchecking its box.
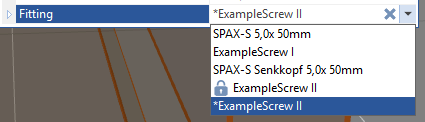
When you look at the screw now, you will notice a closed lock.

This means, that if someone tries to change the parameters of this screw now, SmartWOP will not allow it, instead it will create a copy of it -indicated by the *.

Your screw however can always been selected from the dropdown now, without any changes to them.
Please note, at this point it is not possible to have screws you created in the Screw connector category appear in the list for Screws/Dowels and the other way around. You have to create it separately for each connector type.
Enjoy constructing with SmartWOP!