This guide is meant to detail how to deal with Layers of your Panels. This is especially important, if you – in general – produce your own panels.
In this example we will create a cross-banded lumber board with veneer on the surfaces.
The upper part of the Material Creation Template can be treated exactly like described here.

The interesting parts come next. Editing the Panels.
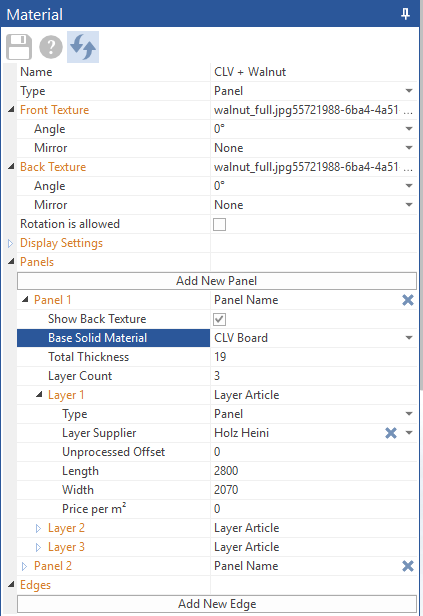
Base Solid Material determines the type of core board you are using, e.g. particleboard, MDF or in this case CLV board.

The Material Preview will change accordingly.

Next up is Total Thickness. This is another very important setting. You have to enter the combined thickness. Meaning for our example, the CLV board is 19 mm. We will add veneer on each side, the veneer used is 0.8 mm per sheet. Combined this would be 0.8 + 19 + 0.8 = 20.6 mm! This means using this material will require you to change the dimensions of the Panels to 20.6 mm too.
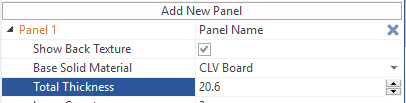
For example in your Horizontal Panels.

Now let’s deal with the Layers. This panel is going to have 3 layers. (Max amount of layers is 15)

Click on the first layer and enter a name or article number – Walnut Veneer in the Example.
![]()
Next, pick the Type of layer – you can choose between Panel, Veneer or Varnish

You can enter or select a Supplier, if you want.
Layer Thickness, as mentioned earlier – important to get right – in this case we said the veneer was 0.8 mm.

Unprocessed Offset – this is important for you, if you choose to use a surface material that protrudes the core panel. Like the veneer would usually do. However we sent our apprentice to format the readily pressed veneered panel on the tablesaw. So in this case there is no offset.
Since the veneer sheets come in different sizes – Length and Width are not applicable here. Not setting these parameters up correctly will not impact the designing and construction, but it will show on the material lists. Price per m² at the moment can only be used in connection with other software and can be left empty.
Repeat this for the core layer (select Panel in the Type selection) and the lower veneer layer accordingly.
This concludes the panel itself, however you have the option to create Edges here too. Let’s imagine we wanted to use solid wood Edges.
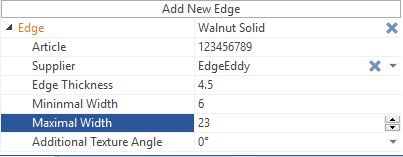
We have named it Walnut Solid, entered an Article Number, selected or entered a Supplier. Since this is a solid wood edge, the Thickness is 4.5 mm, it is usable for panels between 6 and 23 mm.
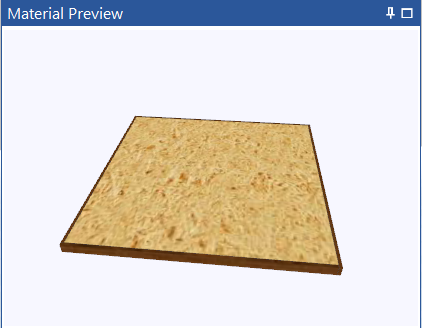
The Material Preview has also been updated.
Repeat those steps for all panels and layers accordingly.
Enjoy construction with SmartWOP!