With SmartWOP you can easily design & construct furniture. This guide will show you the first steps to creating something amazing.
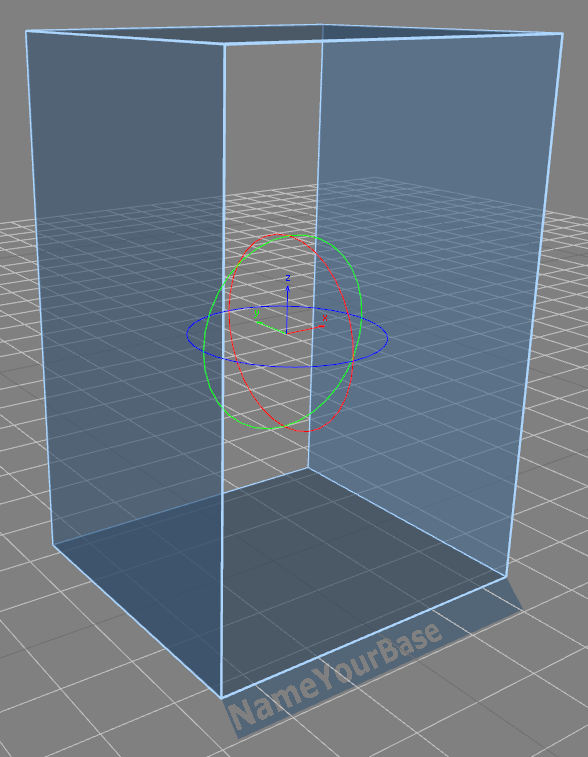
Get a Base Volume – SmartWOP construction is based on volumes, so for you to start working on your own design you need a Base
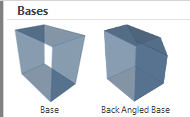
Base volumes can be found in the Items tab (Hotkey: E). For this guide we will use a regular base. Drag the volume into your work area on screen.
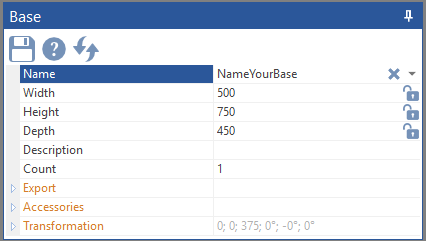
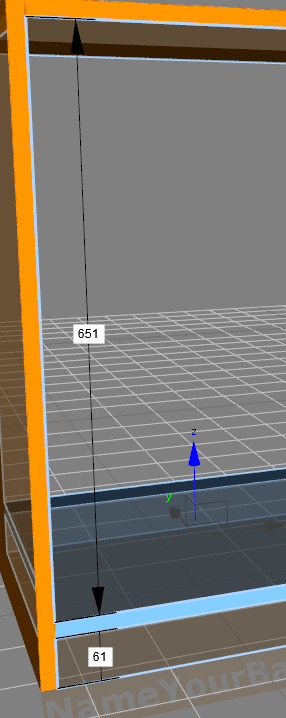
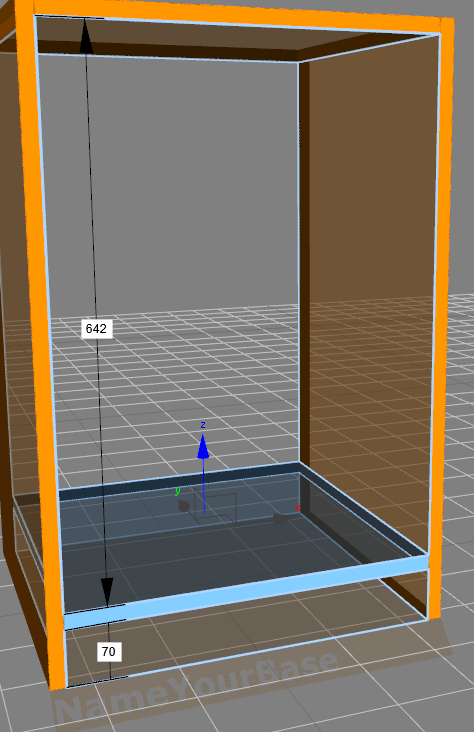
When you have dragged the base into the work area a window with its properties will open. Here you can name the Base, which is important, because every program and list item will be named accordingly.
Here you have to define the dimensions of the base – you can change them at any time and everything you have constructed inside the base will adjust accordingly.
Once you are happy with your dimensions. Click on the Export section of the base template. Especially when you are just starting to use SmartWOP you need to set this up the way you prefer to work on your CNC center.

In this case the panel will always be worked on position 1 on the machine table and the front of the panel will be aligned towards the front bedstop of your table. Select your preference and hit the floppy disk icon to save this. This will now be you default working position until you change it.
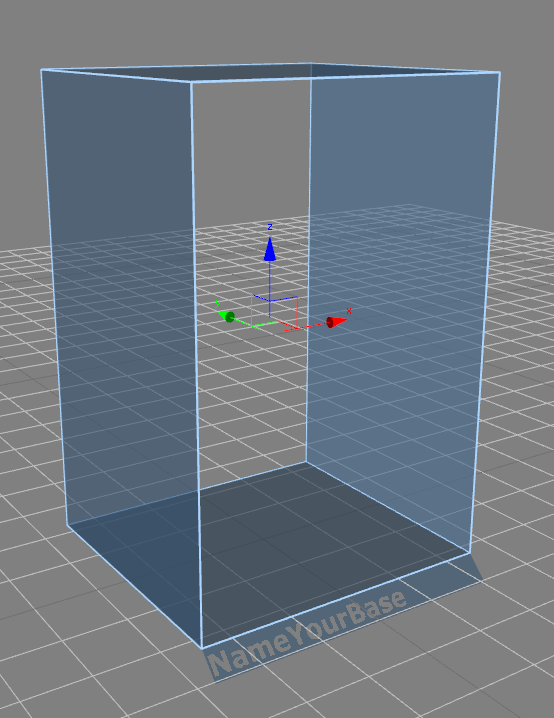
This is the base volume. When an item in SmartWOP is selected, it will be highlighted in blue. Also you will notice arrows pointing in direction of each axis. You can click and drag them to move and adjust positions of items. For base volumes you also have the option to rotate it.
While having the base volume selected, click on Rotate (it is greyed out until you activate it) – the axis arrows will change into circles allowing you to drag and rotate them.
Now let us get the construction going!
In your Items tab, you will find a variety of panels. Each panel has unique traits and can sometimes be used in more than one function.
It is important – especially when you are still learning SmartWOP – to think about the construction sequence. You need to construct from the outside towards the inside.
We will start by dragging in a Vertical Panel to the left side and one Horizontal Panel to the top. If you add another Vertical Panel on the right now, you will have to different corners.

If you want the vertical sides to go through, you have to place them first, left and right. If you want to have the horizontal panels to go through you have to place them first.
You can not simply change corner joints. Keep that in mind when you start construcing.
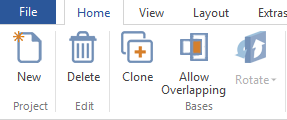
To Delete a panel simply select it, and press DEL or use the Delete icon in the menu bar. Now in this guide, the sides of the cabinet are going through, so I have to delete the right side and the top panel and started over by dragging in the right vertical panel first and then go for the top and bottom panels.
While placing the Horizontal Panels, notice the white text boxes, enabling you to enter a number directly. This can help speed up your work.
Simply click into one of them and change the number. The opposite distance will change automatically.
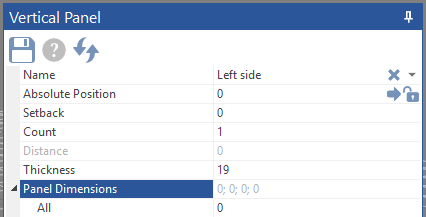
Just like the Base, each Panel has a window to indicate its properties. Horizontal and Vertical Panels have no special options (such as Mitres). Frontal and Diagonal Panels have the option to use Mitres, read about that here. For all these Panels you can change the setback, the thickness and adjust the panel dimensions. – If you need the front of the panel to be 20 mm shorter enter -20 in the Front section and so on.
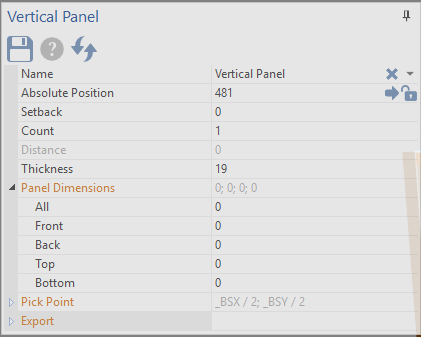
Do not forget to enter a name for those panels, as it makes every step on the machine easier.
Now we have the sides and top and bottom, next up is the Back Panel. After dragging it in, have a look at the preferences.
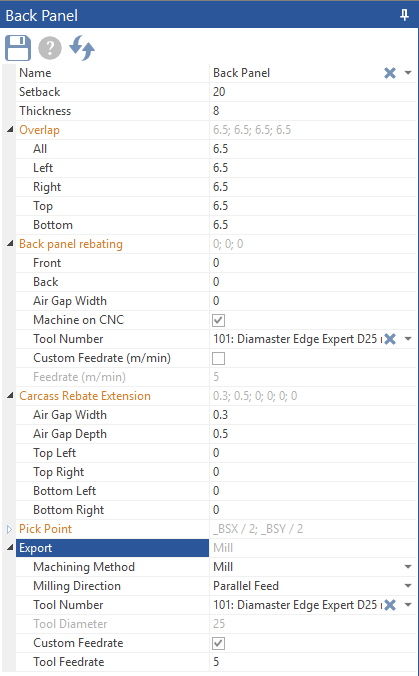
You have a lot more options than with the panels before. For now we’re only going to have a brief look at them.
Setback and thickness. In our example, the setback is 20 mm and the panel is 8 mm thick. In reality this means the actual setback is 20 mm – 8 mm = 12 mm.
In the Export section you will find Machining Method, this will allow you to switch from having a rebated back panel to a grooved back panel by selecting either Mill or Saw.
Next up, some Adjustable Shelves.
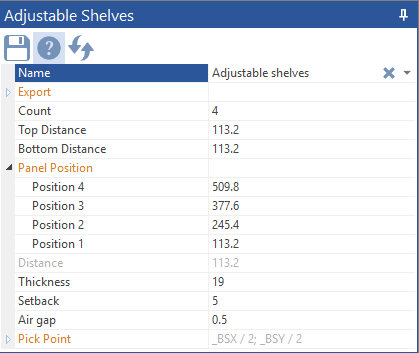
You can change the number of the shelves by changing the Count. The shelves will automatically align in even distances to each other. You can manually change that, if you wish.
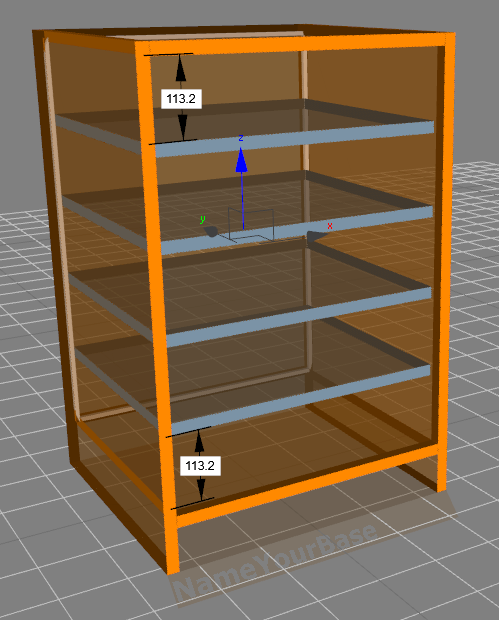
For this example 4 will be the right number. Please note, the actual positioning of the shelves can change slightly once we have our system holes in place.
The last item on the list for this small cabinet is the Door.
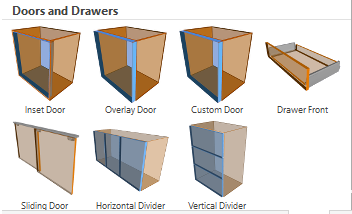
Drag one Overlay Door towards the base and it will automatically snap to the volume.
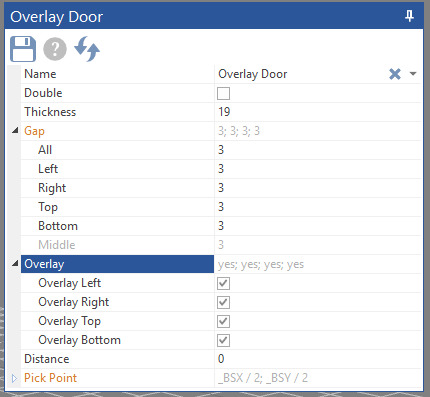
As for the door’s preferences, checking Double will divide the door into two, you can change the Gap on each side, unchecking one or more Overlay boxes will adjust the door accordingly (unchecking all four would make an Overlay Door an Inset Door) – in this guide, we will leave everything as it is and move on to the machining.
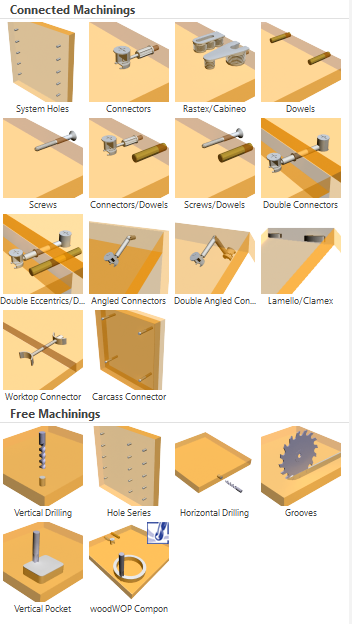
Machining the joint connections is next, go to the Machining tab (Hotkey: B) and you will find a variety of different machinings. Connected Machinings will allow you to connect panels and bases and Free Machinings will allow you to freely add drillings and grooves etc to your design.
You can now either drag and drop the machining type you like to the joints of our cabinet,
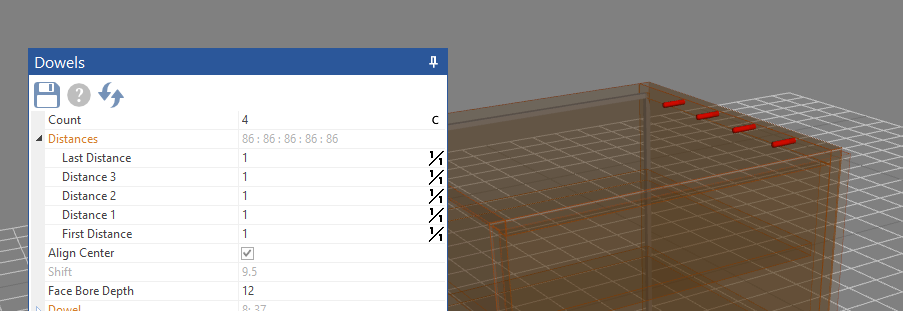
Like I did here; I dragged the Dowels to the upper right joint.
Or, you can also select the joint you wish to connect, or even all of them at once:
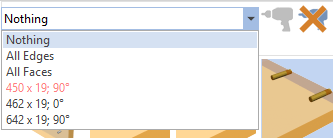
If you open the dropdown menu next to the Drill Icon, you will be able to select accordingly. Panels that in the list are highlighted in red, already have a connection.
Now let’s select All Edges.
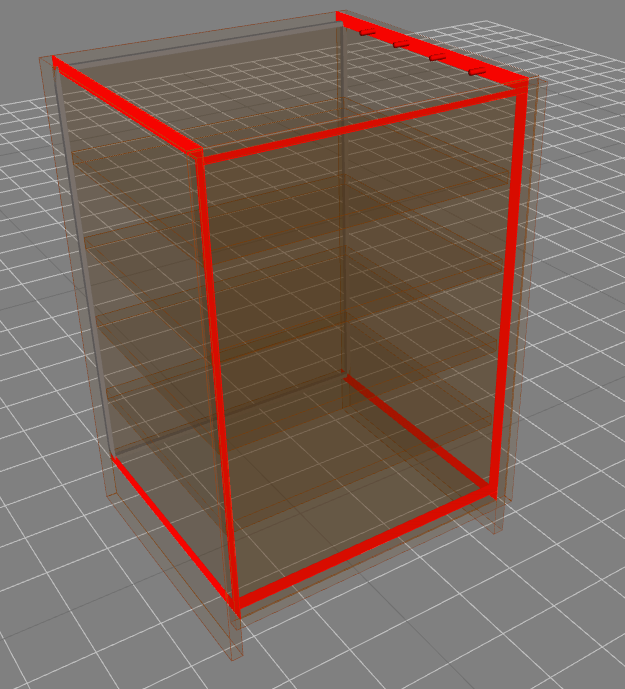
SmartWOP will highlight all possible joint connections.
Now select the Dowels Icon, change the Count to 3 and click on the now blue Drill Icon.
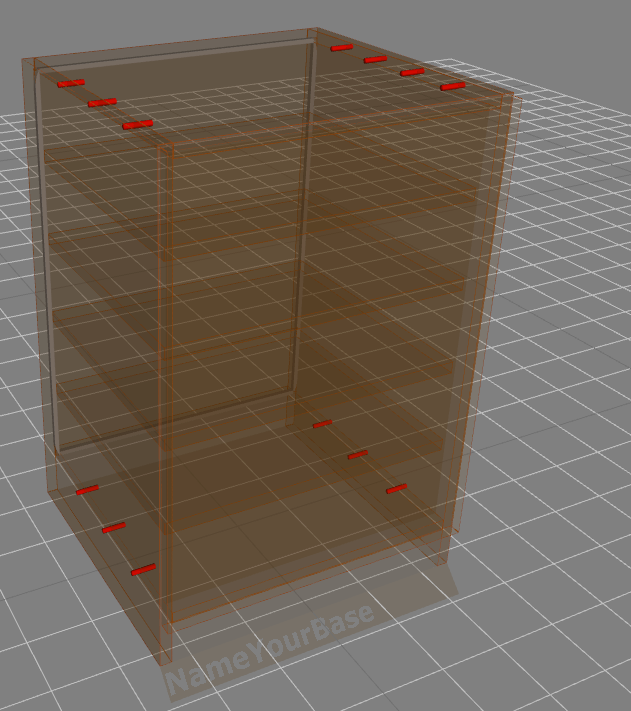
SmartWOP will place dowels into all edges to connect the panels, except the one where we manually dragged the dowels into before. It still has 4 dowels there. To change that simply click on them while in the Machinings tab and change the count to 3.
Next up are the System Holes to go alongside the adjustable shelves. Click on the System Holes icon in the Machinings tab to bring up the template. Note that if the left side of the properties window shows a red hue, you are editing the template (for each subsequent part) and if it is white, you are editing the properties of a particular part.
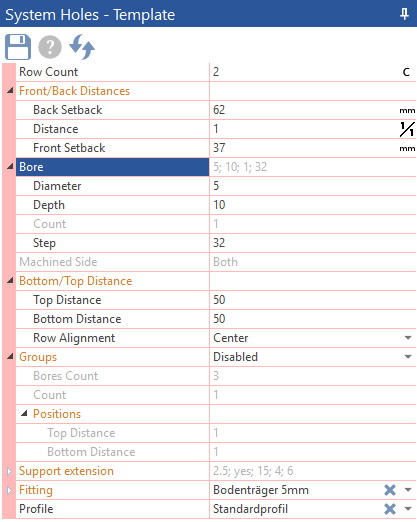
The upper sections are self explanatory, so we will focus on Groups – this enables you to select groupings of holes rather than a full line of them.

If you enable the Groups, you can select how many bores per group and how many groups in total. Select Link to adjustable Shelves and the bores will automatically adjust themselves around the adjustable shelves without moving their position. If we choose Disabled, the position of the shelves might change slightly because SmartWOP is aligning the shelves with the parameters you specified in the System Hole template.

Let’s go over to Fittings to find a Hinge for our door.
Select the Fittings tab.
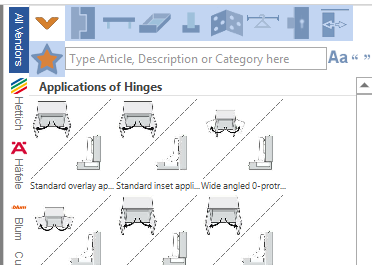
By default, SmartWOP will show you your favorites first. So, if you do not have any favorites yet, click on the yellow star first to make your selection. Next, select the Hinge icon.
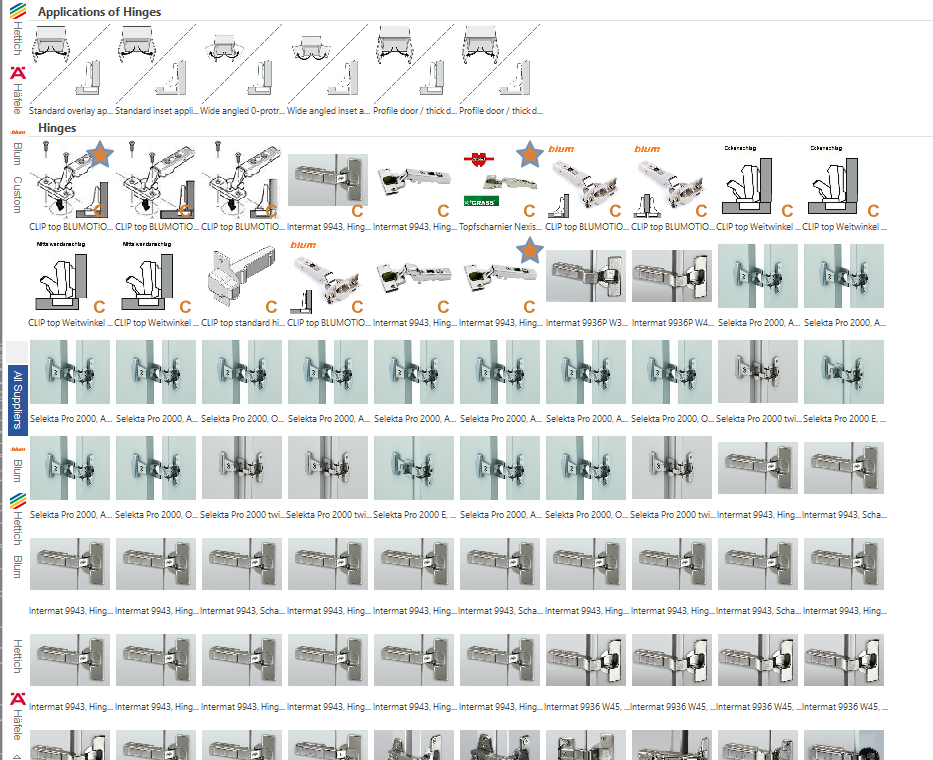
As you can see, SmartWOP comes with heaps of hinges preinstalled. Select a hinge that suits the door and drag them onto it.
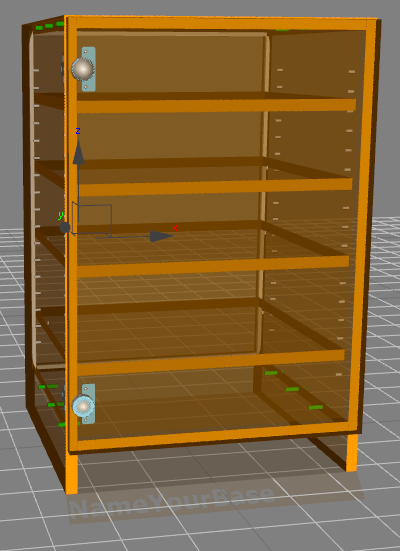
I chose the left side, you can also drag them onto the right side of the door. To get the hinges to the top or the bottom, you have to change that in the hinge preferences.
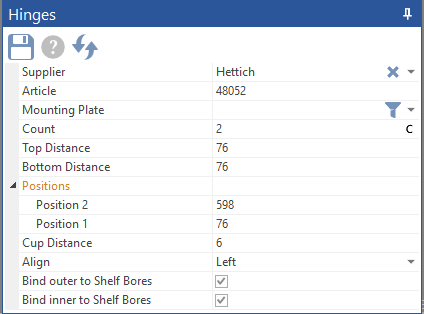
To have the hinges be at the bottom or top of the door, select the Align section and choose accordingly. Bind inner/outer to Shelf Bores this means, SmartWOP will align the mounting plates with your system holes.
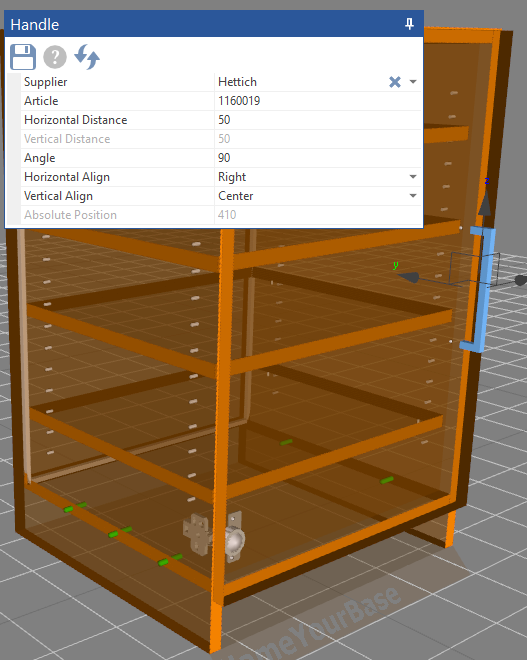
Finally we need a Handle to open the door with.
Go to the Fittings tab and select the Handles section
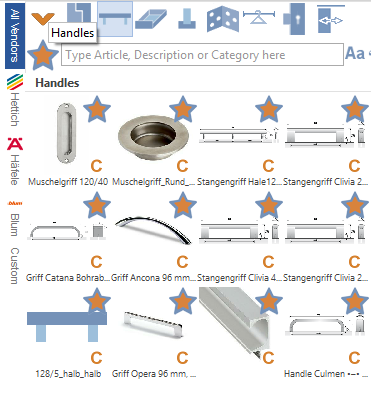
Pick one and drag it onto your door. You will most likely need to adjust the Angle to 90°.
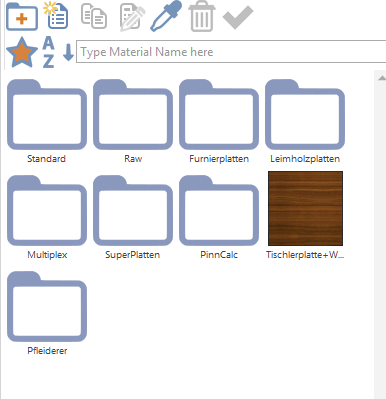
Now that the basic construction is complete, we can have a look at the Materials we want to use in this build.
Go to the Materials tab (Hotkey: M) where you will find a selection of materials ready to use.
When you do, your view automatically changes to something a little more realistic.
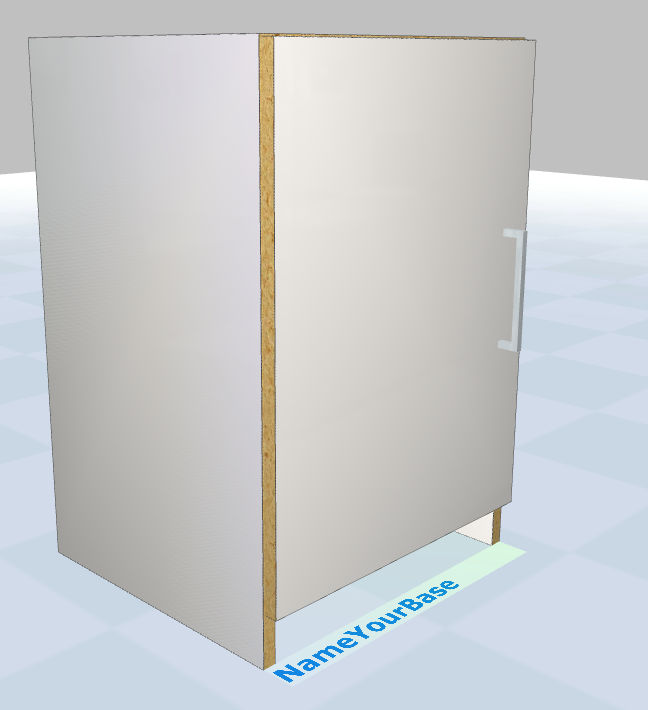
Since the standard material is particleboard with white surfaces, that is what our cabinet looks like. If you now click on an item, for example the door, a Selection window will appear.
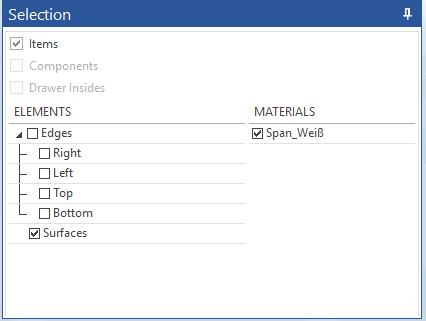
Now since all Edges are visible with this door, as well as the surface, we want to check all the boxes. Navigate to the material you want to use in your materials folders and then click on the yellow checkmark to apply them.
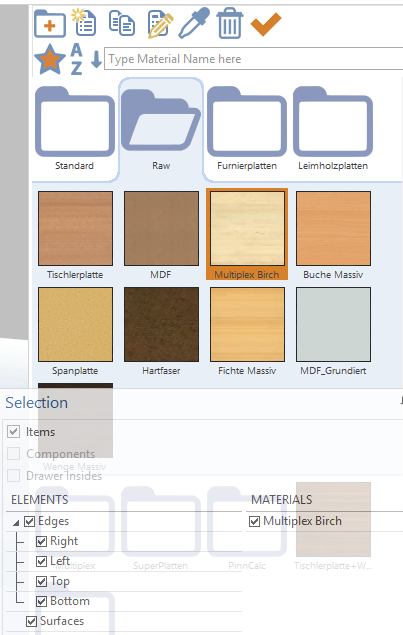
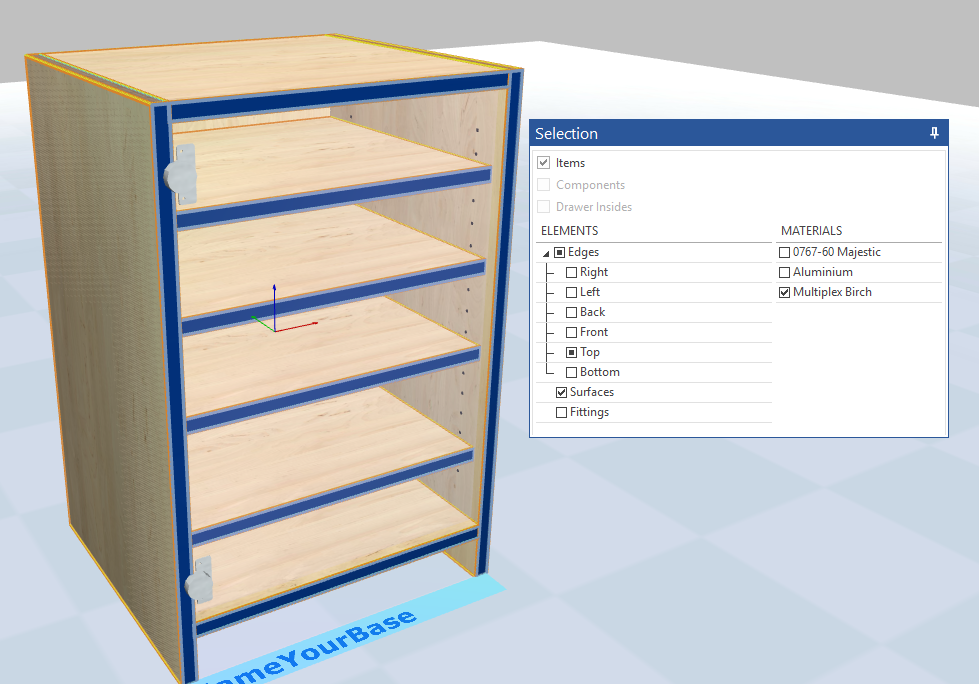
In this case, I chose a raw multiplex panel with birch veneer and the view is adjusting accordingly.
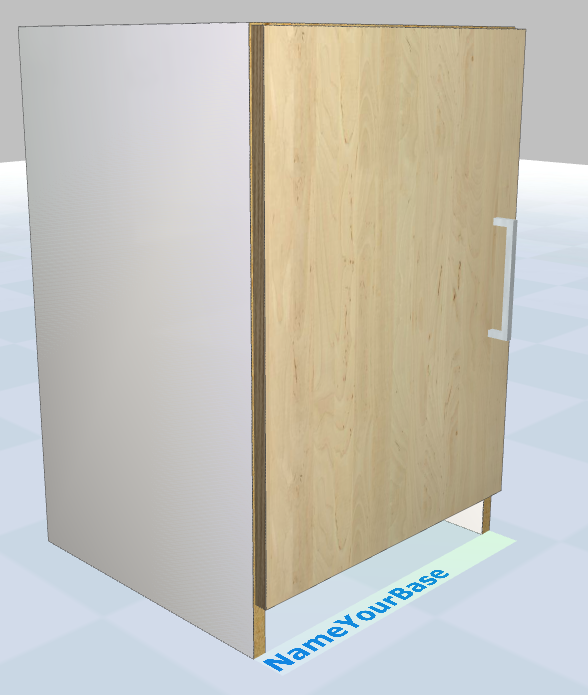
In order to get the edges and inside materials of the carcass set up, we need to hide away the door by pressing the hotkey F.
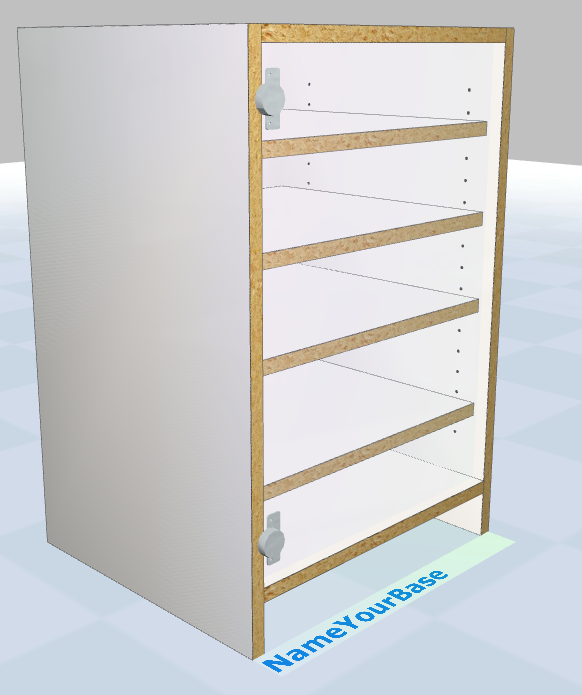
You can now see inside the cabinet and also change the edges that are facing us. Select what you want changed, I chose all front Edges, and select a Material and hit the yellow checkmark to apply.
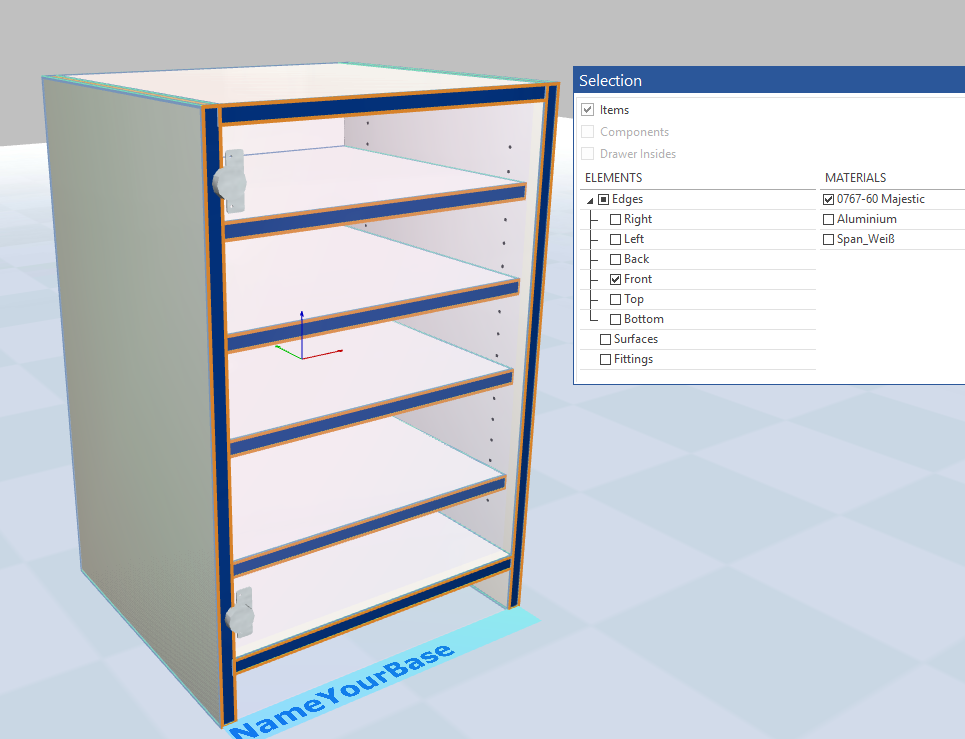
Now we need to deal with the surfaces and the two top edges. Select accordingly.
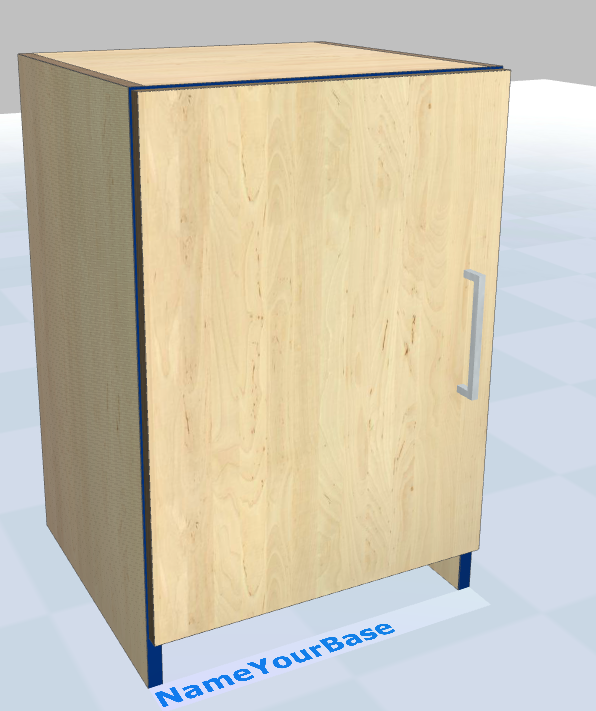
Now you can press J to bring back every item you hid (like in this case the door) and take a look at your finished design.
Now it is time to deal with exporting your design to your CNC centre. This will be explained in another guide!
Enjoy constructing with SmartWOP!